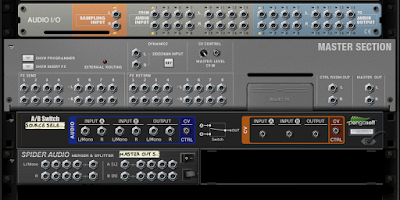
I've been a Propellerhead Reason user for many years and I really enjoy making music with it, but it can get a bit messy and it's easy to get lost in the rack. Therefore I would like to share my way of keeping the mixer, rack and sequencer clean and organized! :)
Standard Template:
I made a custom template for all new projects. It consists of my standard setup of master send effects and also pre-made columns per instrument type:
 |
| Standard Send Effects |
Send Effects:
1. The Echo
2. RV7000 1
3. RV7000 2
4. RV-7 1
5. RV-7 2
 |
| Standard Rack Columns |
Rack Columns (L to R):
Drums
Bass
Synth
Acoustic
Vocals
I use the
free Rack Extension plugin "Remark" for naming the columns, and for naming and marking other stuff inside the rack. I never put any instruments below the send effects in the "Master Section column" as it's "reserved" for effects only.
Channel & Sequencer Order:
I place the SSL mixer channels and Sequencer tracks in the same basic order as the Rack Columns. Drums and percussions goes to the far left, followed by bass, synths, acoustic instruments and vocals.
Color Coding:
I use my own standardized way to color code instruments and automations as this makes it easier for me to quickly find the instrument I'm looking for, especially in the sequencer. I also use the same colors when I use other DAW's such as
Reaper.
My choice of colors are (by the names given in Reason):
Red - for drums and percussions.
Steel Blue - for bass sounds.
Moss Green - for synths
Kelly Green - for acoustic instruments like piano, strings etc.
Orange - for electric guitars.
Lilac - for vocals or choirs.
Wheat - for
all automations
By coloring all automations in the same color makes them stand out from the midi and audio clips so they can easily be spotted or ignored depending on what you are searching for in the sequencer.
In Reason 8 be also sure to check "Auto-color Tracks and Channels" under Options menu to keep channel strip and sequencer track colors the same!
 |
| BUS naming |
Naming:
Keep the names of the channels short and informational. If I make a bus in the SSL I will always give it a name in UPPERCASE.
 |
| Naming Automation Clips |
I also name all automation clips, so I quickly can see what parameter it's changing.
Sometimes I also name midi and audio clips but not all the time.
Blocks:
 |
| Blocks as markers |
Blocks can be useful sometimes, but when making complex automations or transitions between blocks it's often better to not put the clips into blocks. Another way of using blocks is to use them as markers for different pars of your song.
Combinators:
 |
| Combinators for everything |
Every instrument, I put inside a combinator. It's rather seldom I do not hook an instrument up to another unit, such as a mixer or arpeggiator, and keeping everything inside a combinator makes everything a
bit cleaner in the rack, and also gives the possibility to save the instrument as a combinator patch.
I also use the Combinators rotaries and buttons for automation, and have the combinator as a sequencer track. Though, I hope Propellerhead will release a bigger combinator with several more knobs and buttons as just four of each is not enough when making a bit more advanced patches.
Dual screens:
If you are not using dual screens yet, think again. ;) I always put the SSL and Rack on the left screen, and have the sequencer window on the right.
This is the basic standard of how I set up things when using Reason, but of course it depends a bit on the project itself. I hope this will be helpful in your future projects! :)


